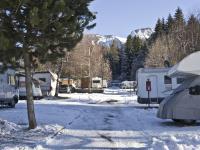
Preparing for a summer camping trip takes little effort; just load up the RV with your clothes and food, and go. However, if you’ll be preparing for winter camping during the dark months in a colder climate, a little more preparation is in order.
Winter camping or winter RVing has its own challenges, but with proper preparation it can be very rewarding. For the most part, you should already have just about everything you need, although a few investments may be required.
I have certainly not “done it all” in terms of winter camping, but I have spent a winter with lows of -20 degrees Fahrenheit. I’ve compiled a few handy tips based on my experiences:
Motor Fuel: If you have a diesel engine, you should consider adding a supplement for cold-weather starting if you’re expecting particularly chilly temperatures. If the outside temperatures will be 20 degrees Fahrenheit or above, there shouldn’t be any issues; but if you anticipate temperatures below 20 degrees, it may be a good idea to add a supplement. For gasoline engines, consider using a dry fuel additive. Also, keep your fuel tanks full, so there is less air in the tank to draw moisture from.
Water: For short-term camping trips, use your on-board water tank. Fill it at home, or before you depart from your last overnight campground stay. In cold temperatures, the hoses can freeze; and some campgrounds may not have water available on the campsite. If you’re planning a longer-term stay, and the campground is equipped for water, you’ll want to make sure your hose is ready for cold-weather use. I have one hose that is ready for just such an occasion. I simply took a normal water hose, and wrapped it with pipe heater tape and foam jacket insulation.
Setting up your own winter-weather water hose is quite easy to do. First, stretch the hose out straight, then wrap the heat tape in a long spiral around its full length. Next, split the foam insulation and cover the heat-taped hose with it. Then tape around the outside of the insulation, using a piece of tape every foot or so to keep it all together. The insulated hose will not coil as easily, but it will do so with a little twisting. Finally, connect the hose between the water supply and the coach, and plug the heat tape in. Heat tapes have thermostats that will kick on at about 40 degrees. I also keep an extra length of heat tape on hand, as sometimes you’ll also need to cover the exposed water pipe. However, campgrounds that promote winter visitation will usually have this covered.
Another option is to purchase a hose with built-in heat. If you are planning on doing a lot of winter camping, this is a good investment. The heat element is molded right into the hose, which is easy to use and rated for potable water. This is on my wishlist.
Black and Grey Tanks: For a short-term stay, just leave the tanks closed and dump when leaving. If you’ll be staying longer and will need to dump periodically, you have two options. You can either hook up, dump and put away the hose, or hook up your hose and let the grey run, closing it up a day before you plan on dumping the black. (This is not much different than any other longer-term stay.)
Utility Bay: Some coaches have a built-in bay heater. If you have one, use it! If not, you can always retro-fit a heater. Several companies manufacture small back seat heaters, which can easily be found on the Internet. They cost about $120, and can be hardwired in with a remote switch. I tend to do quite a bit of cold-weather camping, so this was a great investment. Another option is to use a 100-watt lightbulb. Simply wire up a porcelain socket on a 10-inch-square piece of wood. (You may also want to consider adding on a wire bulb protector.) This will give off enough heat in a small area to help keep the temperature above freezing, and should work as long as the outside temperature doesn’t dip below 10 degrees Fahrenheit.
Interior: Use your furnace as your primary heat source! Remember, your furnace is also used to heat the basement. If you rely on electric heaters inside, this will cause your furnace to run less; which means that the basement will stay colder. Frozen pipes are not an issue you ever want to deal with! Let the furnace do its job; you can always use something like a little cube heater as a supplement. Note: If you are boondocking, remember that your furnace draws off the house battery and can be a fair draw; so use your generator to keep the batteries charged. Before leaving, check the batteries to make sure they are healthy.
Curtains are great insulators, so be sure to draw them at night to help keep heat from escaping. You can leave them open during the daytime to let the sun in.
Humidifiers: A hot-air furnace tends to dry the air, so you can use a humidifier to restore moisture. However, use with discretion, as overuse will cause condensation. Leaving a ceiling vent cracked open will help keep this to a minimum.
Winter camping can be lots of fun. It’s a great way to enjoy a ski vacation or visit family in northern climates — but remember to stay safe. Driving an RV on icy or snowy roads can be a hazardous experience, so choose your travel days wisely. And if you have driven through slush, snow and salt, be sure to give your coach a thorough washing when you return to warmer climates!
Source: Bill Whetstone, RV Technical Expert


